Showing posts with label NETHERLANDS. Show all posts

5.29.2011

Risotto, ripasso and the triumph of good over evil

Fun things to do over Memorial Day weekend in Holland:

1. Walk through the neighborhood counting rose-bushes...


2. Have an impromptu dinner party with the FranKats...


3. Make pumpkin-parsley risotto...


4. Sample a flight of Valpolicella (starting with the 2008 Ripasso)...


5. Thoroughly enjoy the aforementioned risotto...


6. Stake out the kitchen to see who sneaks in to lick the pot...


7. Take cool pics of your friends making coffee...


8. Enjoy said coffee in the silliest cup you can find...


9. Watch good triumph over evil...


10. Hug your friends a lot and count your blessings.

Things not to do:

1. Paint your house the wrong color...


With regard to the latter, if you choose to ignore this sage advice and do it anyway, it helps to have an extremely good sense of humor and considerate friends who bring you apple flaps.

As for the rest, these things have my highest recommendation, with honors.


Risotto con Zucca (Pumpkin Risotto)
adapted from Amaretto, Apple Cake and Artichokes by Anna Del Conte
Serves 4

3 tablespoons (50g) butter or 1/2 cup olive oil
1-4 shallots (or 1 onion), chopped
2-3 cloves garlic, chopped
1/2 teaspoon sea salt
1/2 teaspoon sugar
1 small bunch Italian (flat) parsley, chopped
1-1/2 cups pumpkin, cubed (500g/1lb)
2 cups risotto rice (300g)
1 cup vino bianco (white wine)
5-6 cups (1.5L) vegetable broth
freshly ground pepper
1/2 cup grated parmesan, to serve

In a medium saucepan, heat the vegetable broth.

In a separate, heavy-bottomed saucepan, start by making your soffritto. This is the base for every good risotto. [Note to the Italian boys, there is an actual translation for soffritto - it means "underfried".]  Heat the butter or olive oil over medium-high heat. Add the shallots (or onion) and the sea salt - this will help onion soften the onion without browning to keep the flavor delicate. Add the sugar and cook for 3-5 mins. Add the garlic and half the parsley and cook another 3-4 mins, stirring frequently.

Next, add the pumpkin and cook until fork-tender. This could take anywhere form 5-20 minutes, depending on the pumpkin. If it starts to stick, add a few spoons of stock to keep everything loose.

When you can cut through the pumpkin with the side of your wooden spoon, add the rice and saute for 1-2 minutes until the rice is well coated and slightly toasted.

When the rice is slightly translucent or spotted turn up the heat to high and stir for about 30 seconds to keep it from burning before adding the white wine - it should make that great sizzling sound and begin to evaporate immediately.

Then turn the heat back to medium and continue cooking (and stirring) until the wine has evaporated. Add enough stock to cover the rice completely and continue to cook, stirring often, until all the liquid is absorbed.

Add one cup at a time of the remaining stock, and keep stirring until it is absorbed again. It is this act of constant stirring that gives risotto its creamy texture. It is also one of the things that makes risotto such a great group activity, as it permits plenty of time to drink and gossip. Master this and you, too, can be a bona-fide Risotto Queen.

Repeat until the rice is al dente, tender but still very chewy. The consistency should be slightly liquid, somewhere between solid and soupy. Then season with a bit of pepper and check the salt.

Mix in half the parmesan and let sit for one minute (not much longer) to blend.

Spoon it into shallow bowls, sprinkle with remaining parsley and grated parmesan and enjoy immediately.

Note: If this isn't decadent enough for you, the original recipe calls for 150ml (about 1/8 pint) of heavy cream and a knob of butter to be mixed in with the parmesan just before serving. It was perfectly lovely (and light) without these, but feel free to indulge if you've done something extra good to deserve it.

5.26.2011

All in good time

I've been extremely antsy lately.

Last night I jumped on my bike and just started riding. I didn't know where I was going, but I was going to get there really fast.

I got lost. Well, as lost as one can get in Utrecht.

Actually, I knew where I was at all times: On the corner where the little calf jumps around the yard like a puppy. Past the house where the wild boar forages around the dandelion patch. Near that beautiful pair of horses who are always cast in the most perfect tree-filtered light. In some scary ghetto near the train station, literally on the wrong side of the tracks...


Yes, I always knew exactly where I was - I just had no idea where that was relative to anything else. But I kept riding. And shouting at the sky.

I wanted to exhaust myself. To ride until my legs turned to jelly and simply refused to support me anymore. To force myself into submission. So I would have to stop and just. be. still. Whether I liked it or not.

I'm certainly not complaining - no one loves globetrotting more than I do. But I suppose the downside to making 40 international trips over the past year is that we haven't really settled down long enough to decide where we're going to live. In the meantime, I haven't the slightest idea what I should be doing with myself. Should I be trying to make friends here? Find a job? Get my residency permit? Ship the rest of my shoes? Or is that all pointless if we really are moving soon? And if so, where are we going...?

These are just a few of the hundreds of rhetorical questions that I've been asking my husband with increasing frequency and decreasing patience. Thankfully, he is extremely understanding and has not (yet) chucked me into the canal.

I know that my restlessness is pointless. That there is a natural order to all things, that some take longer than others, and that the best things in life are worth waiting for.

And whenever I need reminding of this, I make a risotto.

There are a few secrets to a good risotto, but none so important as time. Anna del Conte, one of my favorite Italian food writers, insists that "risotto requires a generous amount of butter (and usually cheese] to achieve its lovely, creamy consistency." However, in an attempt to reduce the amount of butter and cheese I've been consuming (particularly since moving to Europe), and I can personally attest to some of the loveliest, creamiest risotto dishes being made without an ounce of either.

If you want to make a proper risotto - I'm talking about a truly transcendent bowl of warm, gooey deliciousness - you need to get comfortable in front of your stovetop. Contrary to popular belief, it is neither butter nor cheese that gives risotto it's creamy texture - it's the gentle action of continuous stirring that loosens the starch from the rice grains and releases them into the cooking liquid.

I've not the slightest idea whether substituting butter and cheese for stirring time would work. To be honest, it never occurred to me to try. Risotto is one of my guilty pleasures. The enjoyment of this dish lies not only in its divine texture or its ingredients, but in its making.


How often do we allow ourselves one uninterrupted hour of time to stop and think, to chat with a friend, to enjoy a glass of wine before dinner and flirt with our spouses the way we used to when we were trying to hard to impress them...


For me, it is the culinary equivalent of meditation - only when you're done, there is a kick-ass dinner waiting for you as a reward.

This one in particular set off a string of spontaneous F-bombs in our kitchen.
And I mean that in the best possible way.


Sun-Dried Tomato-Basil Risotto with Balsamic Vinegar
adapted from my friend Karie's recipe (thanks girl, we owe you one!)
Serves 4

5 cups vegetable broth
2 small tomatoes, peeled and chopped (about 1-1/2 cups)
2 tablespoons extra-virgin olive oil
1 yellow onion, finely chopped
2 cloves garlic, finely chopped or pressed
1-1/2 cups (250g) arborio rice
1 cup red wine
4-5 sun-dried tomatoes (about 3 oz), cut into bite size pieces
1-1/2 tablespoons balsamic vinegar
3 tablespoons flat-leaf parsley, chopped
salt & pepper to taste
20 fresh basil leaves, cut into thin strips (chiffonade)
2 oz goat cheese, crumbled (optional)

Pour the veggie broth into a saucepan and add the chopped tomatoes. Bring to simmer and reduce to warm, but don't take it off the heat. It's important that the cooking liquid is always hot to facilitate the starch release.

While that's happening, warm the olive oil in a heavy-bottomed pot over medium heat. Add the onion with a teaspoon of salt - this will soften the onion and keep it from browning. Then add the garlic and saute until soft.

Next, add the rice and stir with a wooden spoon until the rice is thoroughly coated and becomes translucent. Nicely toasted rice is another secret to great risotto.

Add in a cup of red wine (and pour one for yourself while you're at it) and stir until the liquid is absorbed. Then add a cup of the broth and tomatoes and stir. And stir. And sip. And stir some more.

When the broth has been absorbed, add another cup and keep stirring until the liquid has again been absorbed. Feel free to pour yourself another glass of wine. Call your mom. Make out with your husband. But whatever you do, keep stirring.

Continue adding the broth a cup at a time. When the rice starts to soften (test a couple of grains after 2-3 cups), stir in the sun-dried tomatoes then continue adding rest of the broth (a cup at a time) and stir-stir-stirring until the rice is al dente (tender but slightly firm in center).

When the rice is nice and creamy, stir in the last cup of broth along with the balsamic vinegar. When these have been mostly absorbed, remove from heat, add the chopped parsley and season with salt and pepper to taste. The traditional texture is all'onda (wavy). It should spread out easily, but not have a watery perimeter so be sure not to cook the liquid out completely.

Risotto should be served and eaten immediately or it will continue to cook itself in its own heat which will dry it out and make the grains too soft.

Spoon onto individual plates or bowls, garnish with the basil chiffonade (and a few crumbles of goat cheese if you like) and serve with the remaining red wine.

4.30.2011

A little sun and salt

Tomorrow will be the first anniversary of our engagement and if there's anything I find more surprising than how quickly time has passed, it would be the montage of my random recollections of that day.


If you were to ask a million people to free-associate the words "engagement" or "proposal" it is highly unlikely that you would hear a chorus of cows, neon orange scuba suit, or giant-teddy-bear-riding-shotgun-in-an-Ariel-Atom from any of them - save one if, by some bizarre coincidence, I happened to be in your sample pool.

Another unlikely association would be salt. But being the kind of girl who associates all major events in her life with some kind of taste, this is one of the things I remember the most vividly from that crazy cool day.

The actual proposal came quite unexpectedly one lazy afternoon whilst we enjoyed an impromptu picnic during the only 2-hour window of sunshine all weekend. Our "feast" consisted of one bottle of Veuve (inexplicably sporting the above-referenced scuba suit), half a salami, a block of cheese and some leftover tapenade from the day before, and the last remnants of a bag of garlic crostini leftover from God-knows-when.


It wasn't especially practical to eat out of the boot of the car...


...but luckily, we happened to have an emergency hairdryer box on hand.

This is just one of the many reasons why I love this man so. 

That and the fact that many a would-be fiancé might have panic-paired a last-minute champagne proposal with a bunch of chocolates, sweets or something slightly less savory, but not mine. I may be a certified sugar-monkey, but when push comes to shove, I'll take a sassy salt-block over a sappy sugar-cube any day of the week. Besides, any more sweetness that day would have sent me straight into hyperglycemic shock.

Then again, truth be told, I was pretty salty myself that day - figuratively and literally.
If you're interested in the full story, you can read about it here.


Later that evening we met up with Francesco and Katrin - who, henceforth, will be affectionately referred to as the FranKat's - and the four of us continued celebrating all night at Algarve.

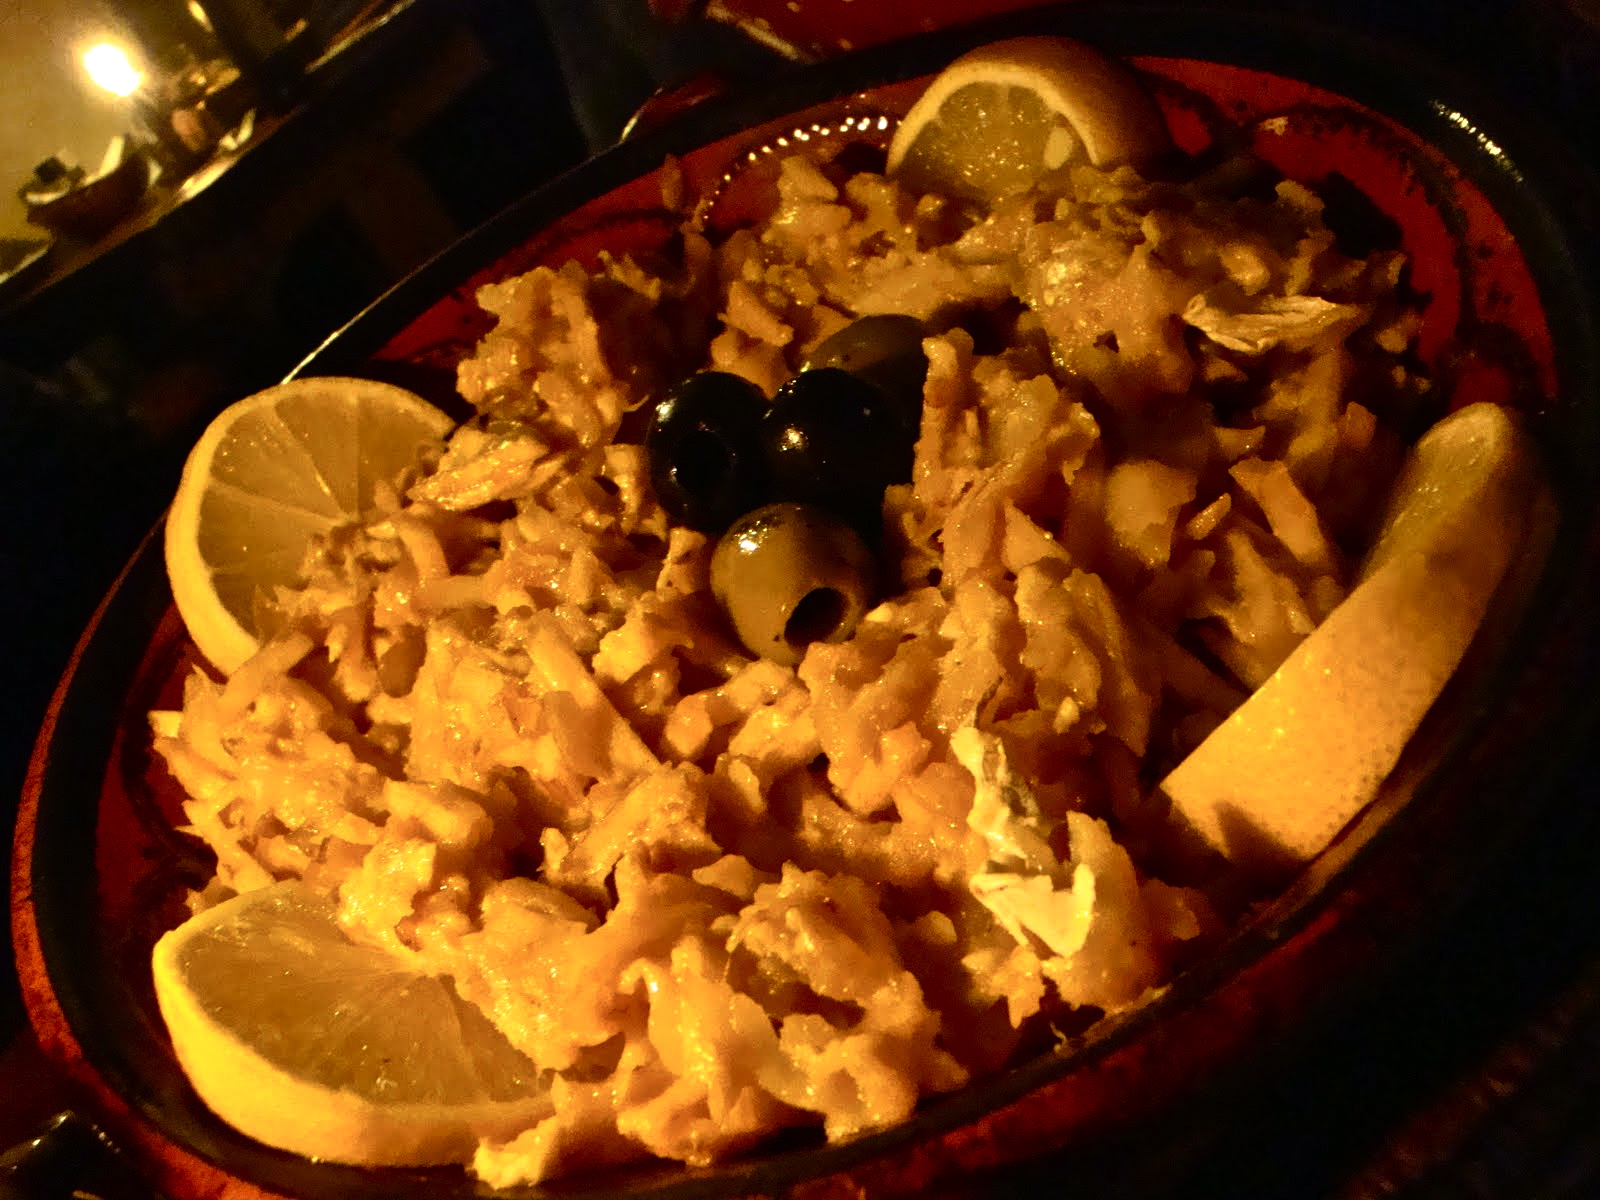
Named for a small region in Southern Portugal, Algarve is the only Portuguese restaurant in Utrecht and conveniently located around the corner between our respective houses. With a handful of tables in the front and one guy doing all the cooking in the back, it's one of those delightful little gems that really transports you and turns a simple dinner into a virtual holiday.


Always quick to befriend the waitstaff - after all, this person is responsible for my happiness for the next couple of hours - I inquired enthusiastically about the menu and was directed immediately to the specialty of the house: bacalhau.

Since the 16th century, bacalhau (known elsewhere as baccalà, bacalao, or just plain salt cod) has been the national dish of Portugal. The tradition is so strong there that dishes are categorized as fish, meat, poultry or bacalhau. Preparations vary from boiling, frying and grounding to grilling or baking. It is well documented that there is a different bacalhau recipe for every day of the year, and there are those who believe even that to be a gross underestimate.


Salt-cured and sun-dried, this unassuming, unsexy fish is even credited with making the Age of Discovery possible by providing the essential protein necessary for long sea voyages. It is also said that once you acquire a taste for it, you may be hooked for life.

Whew. That's one hell of a resume for what essentially amounts to fish jerky.
But damn was it good!

And what a perfectly appropriate metaphor for this day:


That the most average, ordinary, everyday things can become the impetus for a veritable renaissance with nothing more than a little sun and salt.


Bacalhau a Marinheiro (Sailors Bacalhau)
recipe adapted from AlgarveBuzz

This recipe requires a little forward planning if you're using traditional bacalhau, but it's really easy and very much worth it. Once desalted and rehydrated (check packaging instructions as soaking times will vary and some now come pre-soaked), the bacalhau can be cooked and either stored in the refrigerator for a day or two or frozen until you're ready for the deliciousness.

I will admit that salt-curing does impart a unique flavor that's pretty impossible to reproduce, but if you can't find any authentic bacalhau, fresh cod works just as well and it's likely that no one but you will know. If you're feeling ambitious, you can soak it overnight in a saltwater bath of 4 parts water to 1 part salt. Just be sure to cover it tightly or you'll need a boatload of baking soda to rectify the situation.

3 cups desalted bacalhau or fresh cod
1 cup milk + water
4 medium potatoes, cubed, shredded or julienned
3-4 tablespoons olive or canola oil 
1/2 medium onion, finely chopped
2 egg yolks
1 cup full cream (light cream works well also)
3 tablespoons dijon mustard
salt & pepper
1/4 cup full-bodied white wine
1/2 cup breadcrumbs, lightly toasted
parmesan cheese or a cured sheep cheese
6 tablespoons cold butter (optional)

Whether you're using desalted bacalhau or fresh cod, place the whole portions in a pot and cover them completely with a water and milk bath. Let it boil for 15 minutes, at which point you will notice the cod puff up and the portions become much more flaky.

Drain the cod and let it cool. While its cooling, preheat your oven to 175 C/350 F, unless you're going to freeze or refrigerate it for later use.

When it's cool enough to handle, remove and discard the bones and skin. (Another merit of the fresh cod is that fillets are usually boneless and skinless.) Then you can either place the cod pieces in a food processor and pulse a few times to shred lightly, or you can shred it the "authentic" way: place the cod flakes in a cloth napkin, wrap it up and hit it a few times on your working surface. The water will drain off and the cod will be shredded. Just be sure to close the napkin well so as not to create a storm of random fish parts in your kitchen.

Next, peel and shred, cube or julienne the potatoes. Salt them lightly before frying - this will give them a much nicer flavor than salting them later - and fry them in the skillet until golden. Then drain them on absorbent paper and let them cool.

In the same skillet, melt 2 tablespoons of butter, add the chopped onion and sauté. Once they're transparent, combine with the shredded cod and potatoes in a large bowl.

In a smaller bowl, create a cream mixture by combining egg yolks, mustard, salt, pepper and cream. Blend together, then gently add in the wine and stir until well blended.

Pour the cream mixture over the cod mixture and gently fold until everything is one big, beautiful mess. Spoon into an oven-proof pan or individual quiche dishes and sprinkle with breadcrumbs and grated cheese. Dot with scattered bits of the remaining butter and bake for 15-20 minutes.

Garnish with lemon slices and olives if you like.

Serve hot with a leafy-green salad, seasoned with a vinaigrette type dressing (we made this one) and a bottle of your favorite white wine.

If you happen to have leftovers, it's even better the next day.

11.20.2010

For those who keep sweaters in their ovens

In a mad fit of domestic bliss, I felt like making brownies today. Yay!


But we don't have an oven.
Boo.

Unless you think this counts...


Technically this makes me no more handicapped than people like my friend Stacey who keeps sweaters in her oven.

I find it ironic that the one and only commonality she shares with Carrie Bradshaw is the quintessentially definitive trait of a character who, if she existed on any level of reality, would in all certainty be her nemesis. Well, that and I'm pretty sure that if ever either of them were ever afflicted with a rabid craving for brownies, they would satisfy theirs at the nearest overpriced coffee shop.

Sadly, this is not an option for me.

I've recently discovered (at at most inopportune moment of Stage One Chai Withdrawl) that the only two, TWO, Starbucks that exist in all of Holland are at the airport and Nike headquarters. And God only knows what's in a brownie at a Dutch "coffee shop".

Actually, I'm pretty sure Stace knows as well.

In my despair, I turned to Jennfier at Sweet on Veg.  Her adorable website always puts me in a good mood and I desperately needed a good shot of bliss. As if by divine intervention, I spotted a yummalicious recipe for Katrine Volynsky's raw vegan brownies which, Hallelujah and Aaaay-men, don't need baking.

Behold! Salvation is close at hand.


No-Bake Vegan Brownies (a.k.a. bRAWnies)
Makes 4-6 servings*
Time: 30 minutes

1 cup walnuts
3/4 cup plump raisins (make sure they're fresh - if they're dry they won't stick)
1 tablespoon maple syrup
1/8 teaspoon alcohol free vanilla extract
1/3 cup raw chocolate powder or finally ground cacao beans
1/2 teaspoon coconut butter*
1 teaspoon grated raw cacao butter*
* if you don't have these handy, Nutella or any nut butter (peanut, almond, etc) will work fabulously


Guilt-Free Lemon Date Frosting
1/2 cup lemon juice (I use 2-3 fresh lemons but the bottled stuff works in a pinch)
1/2 cup soaked dates


*FYI - these quantities will not yield Starbucks-super-sized squares so if that's what you're looking for, you might want to double the batch. In a glass baking pan of 18x26cm (7x10in) they end up being about 2cm (1in) thick, which is actually fine because they're really dense.

Anyway, moving on...

Soak the dates for at least 30 minutes. For those of us who aren't accustomed to raw food preps, that means stick 'em in a bowl of water.


Next, process walnuts, raisins, chocolate powder, and raw cacao butter (or Nutella) in a food processor. This will yield a gravel-like crumble of nutty chocolate bliss. Resist the urge to start taste-testing.


Now, add the add vanilla, maple syrup, and coconut butter and blend until batter forms into a ball. The first time I made these I ended up with a big bunch of nutty chocolate gravel that bore no resemblance whatsoever to a ball. Turns out the raisins were too dry. If this happens to you as well, you can try adding a little more maple syrup to bind it all together. Or add more Nutella. Nutella fixes everything.

Either way, spread the batter into a glass pan about 1 inch high. If you end up with a pan full of gravel like I did, just spread it evenly and start at one end to mash it down into an even layer until it looks solid and somewhat cuttable.


Place in freezer for at least 15 minutes.

Once the dates are gorgeously mushy, blend them with the lemon juice until it's all smooth and creamy.


I swear this is the yummiest icing I've ever tasted and it's only got two ingredients - both of which are fruit. Crazy good and good for you. Super score.

Supposedly these guys will keep in refrigerator for up to 3 days. This I cannot attest to. They barely lasted 5 minutes in our house.


Update 6.16.11
If you'd like to see what these are supposed to look like, you can take a peek here.

11.08.2010

It's snowing leaves

It's absolutely beautiful here at this time of year, kind of what I'd imagine Vermont or Maine to be like right now. As I write this, it's "snowing leaves" as my friend Sarah would say.


I love the smell of wet leaves.


Lovely.

In my determination to embrace Dutch culture (or at least attempt to blend in), I was stuck by a temporary bout of psychosis and decided to try making something uber-Dutch: those groovy little flavor bombs known as bitterballen.

On the way home from IKEA (which I still can't quite get used to pronouncing as "ee-KAY-ah") where we ran into the FranKats preparing for their housewarming party tonight, we ran into Marnix outside the supermarket.

I'm starting to feel very much at home here. If not a little Stepfordized.

He laughed when we told him I wanted to make the bitterballen. Apparently it's far more "Dutch" to just buy them frozen. Classic.

Oh well. I'm far past the point of being dissuaded now.


The awesome thing about bitterballen is their versatility. They can be as simple or complex as you endeavor to make them and you can even give them their own personalities depending on the fillings and the condiments you serve them with. They are far from healthy, but perfect for those rare occasions when you just must get your Freaky-Deaky-Dutch on.

I'm happy to say that these yummy little suckers turned out great with relatively little effort. Much heartier than your average pub fare or (I'm guessing) the frozen ones, seriously delicious. So good, in fact, that I served them up with a couple of Dutch beers for aperitivi one night.


It felt a bit blasphemous, but damn they were tasty.


Classic Dutch Bitterballen
Makes 30-36 groovy little flavor bombs

This recipe is adapted from a few that I've found from various sources. The gooey deliciousness inside is a roux that I'd say is akin to sausage gravy (except I opt for veal over pork), but they can easily be "vegetized" with potatoes, portabella mushrooms or cheese.

The traditional accompaniment is a basic yellow mustard, but feel free to mix it up with your own personal flavor by serving them with other dips, chutneys, or even barbeque sauces. I opted to try a pureed version of this persimmon relish and it was quite good.

Ok, here we go...

4 tablespoons butter
1/2 lb ground beef or veal (I used 1/4 pound of each)
1/4 cup carrot, finely diced
1/2 cup onion, finely chopped
2 garlic cloves, crushed or pressed
salt and freshly ground black pepper, to taste
A grating of fresh nutmeg
1 tablespoon fresh lemon juice
2 tablespoons flat parsley, finely chopped
5 tablespoons flour
1 cup beef broth or milk
1 egg, beaten with 1 tsp. water
1/2 cup dry bread crumbs
Oil for deep frying

Heat one tablespoon of the butter in a large skillet over moderate heat and cook the meat, carrots, garlic and onion until the meat is browned and the carrots are tender. Drain the meat and place in a mixing bowl. Add the salt, pepper, nutmeg, lemon juice, and parsley and stir to combine. Set aside.

Heat the remaining 3 tablespoons of butter in a saucepan over moderate heat. Then stir in the flour to make a roux. Cook this for 2 to 3 minutes, then add the broth or milk. Continue heating, stirring constantly, until the sauce boils and thickens. Combine the sauce with the meat mixture, stirring to combine them thoroughly, and chill this mixture for at least two hours in the refrigerator.

When the mixture has solidified, roll it into 1-inch balls. Roll the balls in the bread crumbs, then in the egg and water mixture, then in the bread crumbs again.

If you happen to own a deep-fryer, you're way ahead of me. If not, fill a pot with about 2 inches of frying oil and heat it to 375 degrees. Test the oil for "doneness" by dropping in a small piece of bread - when the oil is ready, the bread will crisp up immediately. You want to make sure the oil is hot enough or the little buggers will just soak up the oil like little sponges, which is neither good for your palate nor your thighs.

Fry a few at a time until golden, about 2 to 3 minutes. Drain on paper towels and prepare yourself for some awesomeness.

In the Netherlands these are eaten as snack or appetizer, or as the main course with apple sauce and french fries - might as well get as much use out of that fryer as possible, right? Whichever you choose, be sure to serve them immediately, accompanied by the dipping goo of your choice and a hearty Dutch brew.

Be mindful: the insides are crazy hot (think "liquid magma") so pierce them and let them cool off a bit before popping them in your mouth or the molten explosion will totally fry your taste buds!
You might also like...